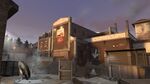
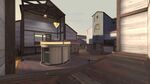
Granary
| Granary | |
|---|---|
 | |
| Map Information | |
| Map type | 5CP |
| Latest version | cp_granary_pro2
|
| First released | October 10, 2007 |
| Last updated | July 14, 2019 |
| Developer | Valve |
| Download | |
| Competitive Information | |
| Format | 6v6 |
| In rotation | ETF2L 6v6 Season 42 OZF 34 |
Granary is a 5CP map created by Valve. It is one of the 6 original TF2 maps. It is a staple in the 6v6 leagues and is notorious for being prone to stalemates.
Contents
Callouts[edit]
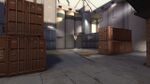
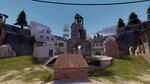
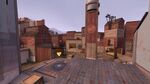
Mid point[edit]
| Granary mid point callouts |
|---|
Garage Choke Balcony / Catwalk Top left (crate) / 2 Top right (crate) / 3 Back left (crate) / 1 Back right (crate) / 4 Far left Far right |
The Granary middle point is characterised best by the big height advantage provided by the four crates around the point. That shifts the class influence to Soldiers, as they're the best at exploiting it. This also means Scouts have less of an impact than usual.
Many teams will use double Soldier jumps to deal damage to the rest of the team that is on the lower ground: the Demoman, the Scouts and the Medic. Due to the layout of the point, the Scout's ability of denying jumping Soldiers is hampered. Because of that, one of the Scouts in a team will usually seek to kill the enemy Demoman, while the other stays by his Demoman to prevent the enemy from doing so.
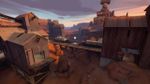
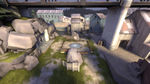
Yard[edit]
| Granary yard callouts |
|---|
Choke Window Garage Left yard Right yard |
| Granary left yard callouts |
|---|
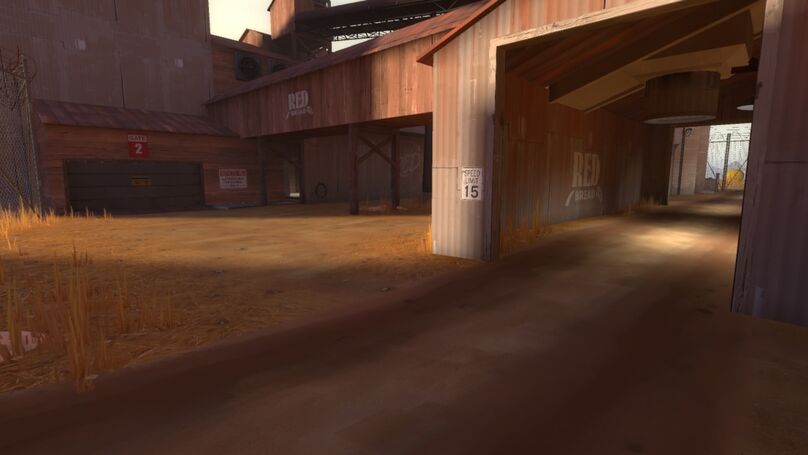
Dropdown Z To stairs / Spiral / Lunchbox Garage Left yard |
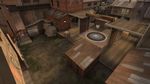
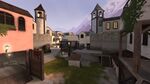
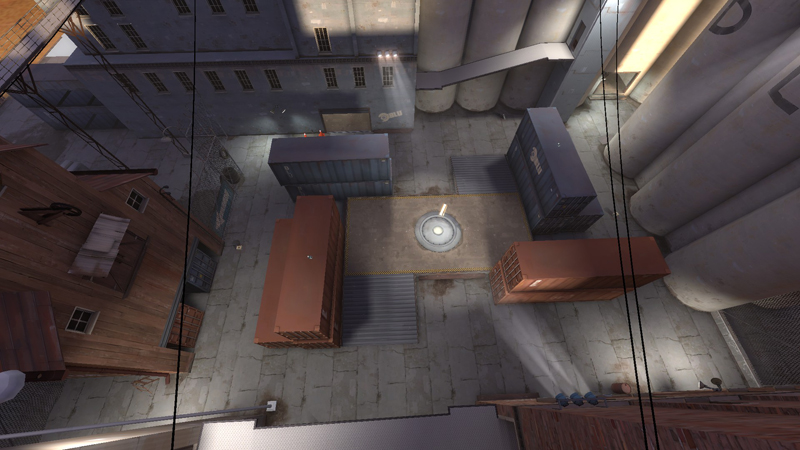
Second point[edit]
| Granary second point callouts |
|---|
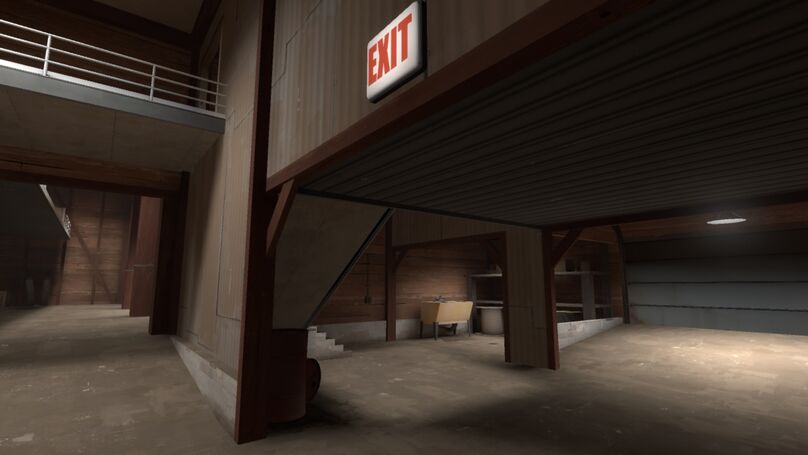
Dropdown Top Left Stairs / spiral Lunchbox |
The second point is very characteristic in the fact that it's divided into two distinct, separated areas, with their respective chokepoints: the yard and the building. That means a defending team can choose to hold each of the two areas, depending on the situation and advantages. The second point is the most prone to stalemates in the whole map.
Attacking[edit]
Pushing the second point is heavily dependent on the other team's positioning. If the enemy is holding in the yard, the following push routes should be considered:
- Through left — The distance between the both teams is bigger than usual, and the entrance is very narrow, and therefore vulnerable to spam.
- Through the window — Often the most preferable push. It offers the shortest route to the enemy combo, allowing the Pocket Soldier to rocket jump directly into the enemies and dealing damage for the team to follow up on.
- Through garage — This is the biggest entrance to the point, and not directly spammable. This allows the Medic to use the ÜberCharge a few seconds later, which prolongs the window of opportunity for the pushing team. The pushing team however has to be wary of the dropdown area, as it offers a good opportunity for the Roaming Soldier to cause the Medic to use early or even drop his ÜberCharge.
When pushing the yard area, the team should seek to acquire a pick or two, which causes the enemy to be unable to keep holding inside the building and forces them to back up to the last point.
Attacking the enemy team holding inside the building can be done in following ways:
- Through shutter — The most obvious route to the second point, but subject to significant amounts of spam from the Demoman. That forces the Medic to ÜberCharge almost immediately after going through the door.
- Through Z — Z is a very narrow walkway, but it is significantly closer to where the combo usually holds. As with shutter, this push pretty much requires an early ÜberCharge, unless the enemy Demoman is down.
- Through lunchbox / top — This push relies on being able to get to the lunchbox area relatively safe, which is not possible unless the flank classes are down or weakened. It is very effective however, as it cuts off potential escape routes if performed early enough.
Due to the nature of the point, a Demoman pick is usually a sign to push, as his stickies prevent the pushing team from taking ground without an ÜberCharge. As most of the action takes place indoors, a Soldier pick is usually good enough as well.
Defending[edit]
Defending the second point relies heavily on denying the other team space by the means of spam. It's extremely important for the Demoman to stay alive, as his sticky traps and grenade spam can cover a lot of entrances simultaneously.
A good tactic is to make the enemy team use an ÜberCharge in yard, to then back up quickly indoors and use the Medic's ÜberCharge to walk out and kill the enemy. This can't be done however if the defending team loses a lot of players before backing out.
To avoid a surprise wrap-around push while holding inside, the flank needs to watch the right lunchbox area and immediately report back if any attackers are spotted, so that the combo is aware of the fact and can back out in time.
Other strategies, such as utilising the dropdown area or using a Sniper to try and get a pick from the forward respawn (requires for the player to respawn while the enemy is capturing the middle point) can also work when at a disadvantage.
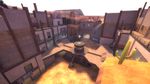
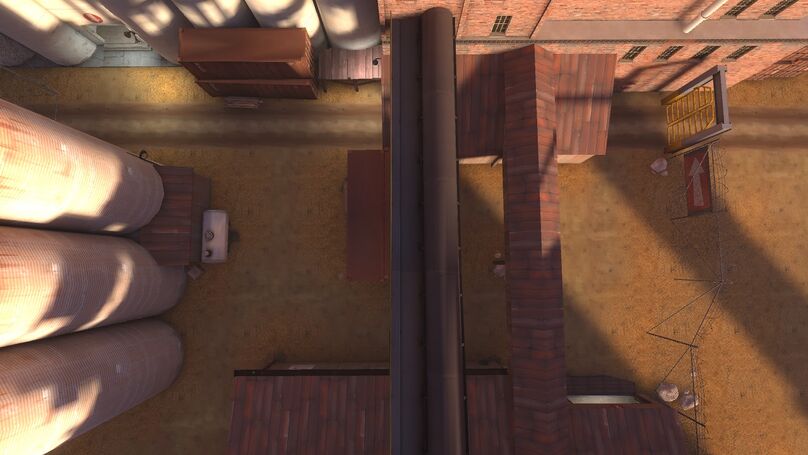
Last point[edit]
| Granary last point callouts |
|---|
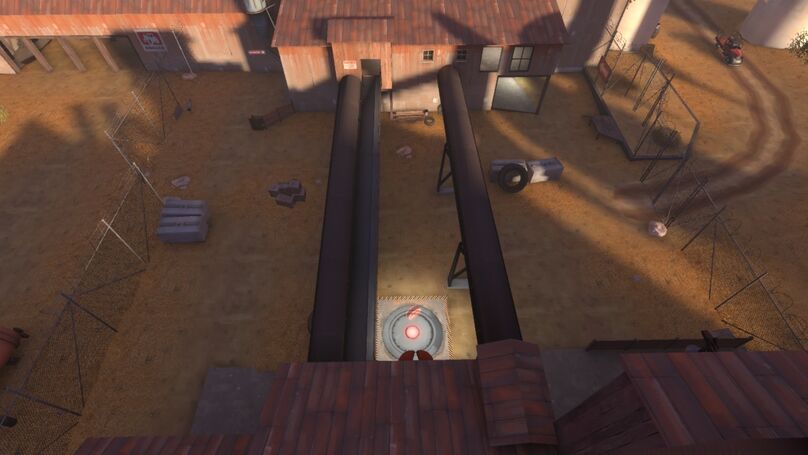
Top right / Window Top left Left Right Left yard Right yard Upper pipe Lower pipe Right spawn Left spawn |
Positioning[edit]
- Attacking
- Scouts — Scouts will often play more passively, often attempting to pick the soldier that normally watches upper. When your team is about to push, go back to your medic for buffs, and either take the uber in, or go through a different door to the one your combo is taking to attack last.
- Roamer — The roamer will generally watch upper, as the enemy roamer coming through there can cause your medic to force or even drop. If in need of health/ammo, either go back to lunchbox for health and ammo, and call a scout to watch upper for you, or get your medic to heal you.
- Pocket — Mostly stays lower, with the medic. If your team decides to push through upper, walk up with your medic, and your demo can sticky/grenade jump up when you reach the top, if you want him to take some of the uber.
- Demo — Mostly stays lower, with the medic. It is important to watch your sticky traps, and to also not stand too far out in the open, as you are a key pick for the enemy team if they have a sniper and intend to push out.
- Medic — Mostly stays lower, with the combo. If your team decides to push through upper, call your pocket to walk up through lunchbox with you. Be careful not to stand right on the point, as then you are in a clear sightline for an enemy sniper if they have one.
- Defending
- Scouts —
Attacking[edit]
When pushing last, you have 3 options of where to send your combo. This will depend on where the enemy team is holding, and so choose a plan of attack accordingly.
- Right shutter — This is generally used when there is a large advantage towards the attacking team, such as if the holding team were wiped on mid. It provides the shortest path to the capture last point without having to walk up with your medic through lunchbox. It also allows the attacking team to get early spam onto the more commonly used spawn door, blocking the enemy team from getting up onto pipe, or getting out of spawn. If used when there are no serious advantages to the attacking team, it can be harder to get into the point, as the holding team will have the height advantage, allowing them to spam down onto your combo.
- Left shutter — The most common method of pushing, as generally the left side is held by the scouts, making it easy to take the ubered combo through here, as the will take less entry spam, and you may be able to delay popping your uber, rather than using it straight away.
Rollouts[edit]
The Demoman can choose one of the three rollouts: through the left entrance, to catwalk or through garage. The catwalk rollout differs from the other two in the fact that it aims for the Demoman and the Medic to take higher ground after acquiring an advantage in the fight, which significantly improves the chance of a won midfight.
Map information[edit]
| Multiplier | Mid | Second | Last |
|---|---|---|---|
| x1 | 24.00 | 12.00 | 4.00 |
| x2 | 16.00 | 8.00 | 2.67 |
| x3 | 13.09 | 6.55 | 2.18 |
| x4 | 11.52 | 5.76 | 1.92 |
| x5 | 10.51 | 5.26 | 1.75 |
| x6 | 9.80 | 4.90 | 1.63 |
| x7 | 9.26 | 4.63 | 1.54 |
| x8 | 8.83 | 4.42 | 1.47 |
| x9 | 8.48 | 4.24 | 1.41 |
| x10 | 8.19 | 4.10 | 1.37 |
| x11 | 7.95 | 3.97 | 1.32 |
| Control points owned by opposing team | ||||
|---|---|---|---|---|
| 1 | 2 | Neutral | 3 | 4 |
| 8 | 8 | 10 | 10 | 10 |
| 8 | 6 | 4 | 12 |
Map pool history[edit]
Granary, along with Badlands, was one of the first maps played in the 6v6 competitive format. Granary is still one of the most iconic and most played maps in 6v6, and is also played occasionally in Highlander. Since the first versions of the map there have been numerous changes to it, resulting in more refined and balanced gameplay but it is still considered one of the slowest maps, this results from being an extremely big map, with very tight chokes and easily spammable, making constant stalemates and spam exchange part of the flow of the map.
| 6v6 maps | |
| Currently in rotation | |
| 5CP | |
| KOTH | |
| Previously in rotation | |
| 5CP | Bazillion · Fastlane · Follower · Freight · Kalinka · Logjam · Mainline · Propaganda · Obscure · Reckoner · Sinshine · Warmfront · Waste (CP) · Well (CP) · Wildmire · Yukon |
| Attack/Defend | Dustbowl · Extraction · Gorge · Gravel Pit |
| Capture the Flag | 2Fort · Turbine · Well (CTF) |
| Domination | Standin |
| KOTH | Ashville · Coalplant |
| Payload | Gold Rush |