Scout
The Scout has the greatest mobility of all the TF2 classes; two jumps and an impressive 136% movement speed makes him a challenge to track down and even to kill once he is found. The Scout carries a Scattergun, which deals massive damage to an opponent at close range. With his high movement speed, a Scout has no trouble getting into close-combat with his enemies; his greatest challenge is staying alive long enough to utilize his high damage. The Scout has only 125 base health, tied for the least out of all the classes along with the Engineer, Sniper and Spy.
6v6[edit]
- Main article: Scout (6v6)
The Scout is a highly mobile "clean up" class, used to capture points and move in and out of fights to deal and avoid as much damage as possible. A competent Scout must successfully capture points, control the flank, and be able to finish off enemies weakened by power classes (Soldier and Demoman). He is also often the best candidates for off-classing, depending on the situation. Scout's most effective tactic is to utilize his high speed to ambush enemy players to kill them before they are able to react. During a mid-fight, at least one Scout should stay alive; losing both of its most mobile players can spell disaster for a team. The Scout should aim to die as little as possible, as a longer living scout has a higher impact.
In the standard 6v6 lineup, each team will have 2 Scouts, falling into one of two common roles: the Flank Scout and the Pocket Scout. The Flank Scout is a part of the flank, and often fights alongside the Roaming Soldier. His main job is to relay information to his team and assist the Roamer. Together, they watch the flank to prevent enemies from attacking the Combo. Should an opportunity present itself, they can attack the enemy Combo and create distractions for their own team to push. The Pocket Scout travels with the Combo, protects his teammates (especially the Medic), and finishes off enemies weakened by the Demoman or the Pocket Soldier. One of his main targets is the "bombing soldier" - an enemy Roamer jumping in to kill the Medic. The Pocket Scout is the primary candidate to maincall due to his mobility and high damage.
Highlander[edit]
- Main article: Scout (Highlander)
Scout's role is far more limited in Highlander, as his movement is significantly restricted by two full-auto high-damage-per-second classes: Heavy and Engineer. As such, Scout is used more often as a utility class, helping the team by being on the flank, capturing points and objectives, and sometimes following up on damage dealt by the combo. He can also be used to harass certain classes, such as Snipers. Scout is often unable to contribute effectively in game modes that force players together (such Payload and Attack/Defend) due to his lack of splash damage, but can be deadly on certain King of the Hill maps with multiple flank routes, which allows him to pick off isolated enemies one by one.
Highlander leagues allow a greater variety of Scout weapons than 6v6 leagues do, which allows for more varied strategies. Scout's role can be enhanced by many of his unlocks: Mad Milk increases his team's survivability during pushes; Bonk! Atomic Punch allows him to distract the enemy team and kite Sentry Gun fire. As long as Scout stays alive and aware, opportunities to flank and ambush will still present themselves.
Weapons[edit]
Primary[edit]
| Weapon | 4v4 | 6v6 | Highlander | |||
|---|---|---|---|---|---|---|
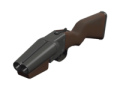
 Scattergun |
Always | Always | Always | Always | Always | Always |
| The stock Scattergun is by far the most widely used primary weapon for Scout in Competitive Play. Its high clip size and massive damage at mid-to-close range can easily give him the upper hand when picking off enemy players. | ||||||
 Baby Face's Blaster |
Allowed | Allowed | Allowed | Allowed | Allowed | Allowed |
| The Baby Face's Blaster gives Scout the ability to charge a Boost Meter by dealing damage which greatly increases his movement speed. However, this comes at the cost of a smaller clip size, being slower than normal with zero boost, and boost being lost if Scout double jumps or takes damage. While the movement speed is potentially very strong, it's unreliable as it only takes 25 damage to completely remove all of your Boost. Because of this, the Baby Face's Blaster receives little use. | ||||||
 Back Scatter |
Allowed | Allowed | Allowed | Allowed | Allowed | Allowed |
| The Back Scatter allows Scout to deal Mini-Crit damage if he shoots enemies in their backs at the cost of a smaller clip size and less accurate shots. While these Mini-Crits can do massive amounts of damage, getting behind people is harder said than done since it isn't something Scout can easily control. This, combined with the Back Scatter's other always present downsides, makes it an unpopular choice. | ||||||
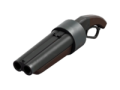
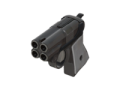
 Force-A-Nature |
Allowed | Allowed | Allowed | Allowed | Allowed | Allowed |
| The Force-a-Nature has only a two shot clip, but in return does more damage per shot and has the unique property of dealing significant knockback to both enemies and the Scout when fired. The knockback to enemies allows Scout to push people off of points or into an unfavorable position, and the self-knockback allows him to propel himself into the air and reach spots he couldn't without it. However, the knockback can backfire, since it could accidentally push an enemy into a favorable position or push Scout away from where he wants to go. The "FaN"'s high damage output makes it good for quick single-target kills, but its low clip size makes it weak in sustained fights and for general killing. While not used often, some Scouts find it a useful tradeoff from the stock Scattergun. | ||||||
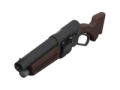
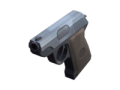
 Shortstop |
Allowed | Allowed | Allowed | Allowed | Allowed | Allowed |
| The Shortstop acts like a cross between the Scattergun and Pistol. Compared to the Scattergun, it's more accurate, shoots faster, does more damage per bullet, and reloads all shots at once, at the cost of a long reload, fewer bullets per shot, and the unlisted downside of taking more knockback while deployed. These stats leads the Shortstop to be worse at close range, but better and medium range than Scout's other primaries. Increasing Scout's range is beneficial, but its low damage output turns away many people from using it. The Shortstop also gives scout the ability to shove people back when deployed, but this feature is seen as pretty useless by most people. | ||||||
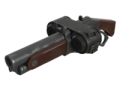
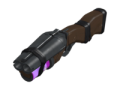 Soda Popper |
Banned | Banned | Banned | Allowed | Allowed | Allowed |
| The Soda Popper is similar to the Force-a-Nature with its increased fire rate and two shot clip. However, instead of dealing knockback, it has a much faster reload and allows Scout to charge a Hype meter by doing damage. Once the Hype meter is fully charged, it can be activated to give Scout five double jumps until the meter fully drains and needs to be filled up again. The Soda Popper's excellent movement provided by the Hype meter, combined with its faster reload allowing for damage higher than the stock Scattergun, is why its banned in many competitive formats. | ||||||
Secondary[edit]
| Weapon | 4v4 | 6v6 | Highlander | |||
|---|---|---|---|---|---|---|
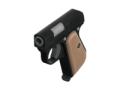
 Pistol |
Always | Always | Always | Always | Always | Always |
| The Pistol is Scout's stock secondary. It holds 12 shots and reloads its entire clip at once. As his most reliable secondary, it can finish off weakened enemies at short to mid-range, or simply distract them at long range. | ||||||
 Bonk! Atomic Punch |
Allowed | Banned | Banned | Allowed | Allowed | Allowed |
| The Bonk! Atomic Punch makes Scout invulnerable for 8 seconds after he drinks it, similar to an Übercharge. However, Scout cannot attack during this time. If he normally would have taken damage, he will be slowed for 5 seconds after the buff wears off. The more damage Scout "dodges," the slower he will become when the buff ends. Bonk! is mainly used to help Scout either flank the enemy team, get through a choke, or escape a situation where Scout would have normally died. This third reason is why this item is sometimes banned, as some people view this ability to "escape death" as unfit for a competitive game. Its downside of slowing down the Scout after wearing off is also bugged and can be fully negated by mashing both strafe keys. | ||||||
 Crit-a-Cola |
Banned | Banned | Banned | Banned | Banned | Banned |
| The Crit-a-Cola allows Scout to deal mini-crits for 8 seconds. However, he is Marked for Death for 5 seconds after each attack while under the effects, allowing enemies to do the same damage to him as he can to them. Since competitive formats usually feature fewer enemies to be shot by than in standard 12v12 games, the Marked for Death doesn't matter as much. This is why the Crit-a-Cola is banned in virtually every competitive game. | ||||||
 Flying Guillotine |
Allowed | Banned | Banned | Allowed | Allowed | Banned |
| The Flying Guillotine is a cleaver which can be thrown to hit enemies from afar. The cleaver will inflict bleed damage on top of its base damage, and has the bonus of recharging faster if an enemy is hit from very far away. While hard to hit people with, the Flying Guillotine not only increases Scout's effective range, but is has a very fast recharge and does very good damage. These factors are why it is often banned. | ||||||
 Mad Milk |
Banned | Banned | Banned | Banned | Banned | Banned |
| The Mad Milk is a jar of 'milk' that can be thrown at enemies similar to Jarate. When it hits the ground or a player, it will explode and cover everyone in 'milk' within its splash radius. Anyone who shoots a player covered in 'milk' will heal 60% of the damage they dealt. Additionally, Scout can extinguish Afterburn on himself or any of his teammates if they are within the splash radius; doing this will even make it recharge faster. The Mad Milk is banned for being too strong of a buff for how spammable and easy to use it is, as it offers very high healing potential along with a very fast recharge and a very generous splash radius. | ||||||
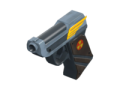
 Pretty Boy's Pocket Pistol |
Allowed | Banned | Banned | Allowed | Allowed | Allowed |
| The Pretty Boy's Pocket Pistol is a pistol that will heal the Scout for every shot he lands on an enemy with it. It also has a faster rate of fire than the stock Pistol, but at the cost of a smaller clip. This weapon is often banned because its faster rate of fire, even with the smaller clip, gives it a higher initial DPS than the stock Pistol, essentially making the Pretty Boy's Pocket Pistol a direct upgrade. | ||||||
 Winger |
Allowed | Allowed | Allowed | Allowed | Allowed | Allowed |
| The Winger is a utility pistol that gives the Scout higher jumps when deployed and does more damage per shot, at the cost of a much smaller clip size. Most Scouts prefer the superior damage output of the stock Pistol, but the extra mobility can be helpful in certain situations for dodging or reaching high areas of a map. | ||||||
Melee[edit]
| Weapon | 4v4 | 6v6 | Highlander | |||
|---|---|---|---|---|---|---|
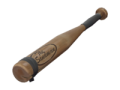
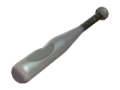 Bat |
Always | Always | Always | Always | Always | Always |
| The Bat is the default melee weapon for the Scout. Compared to other classes, Scout's stock melee does less damage but swings faster. While being ok when used to finish off enemies, the stock Bat is rarely seen as worth using compared to other options. | ||||||
 Atomizer |
Allowed | Allowed | Allowed | Allowed | Allowed | Allowed |
| The Atomizer grants Scout a third jump when fully deployed, potentially allowing him to dodge better and reach unexpected areas. However, it takes longer to deploy than Scout's other melees, which gimps its ability to be used in combat and often relegates it to just being used as a mobility tool when out of combat. | ||||||
 Boston Basher |
Allowed | Allowed | Allowed | Allowed | Allowed | Allowed |
| The Boston Basher is a bat that will cause enemies to bleed when if they are hit by it. If Scout misses and hits no one, however, he will both damage himself and cause himself to bleed. A Scout who has hit himself will even get popped up high in the air, which could help him reach certain areas, but the high self damage makes the Boston Basher very risky to use as either a combat or mobility tool. However, the self damage will help Medic build up his Übercharge, which is why this is Scout's most commonly used melee in competitive. | ||||||
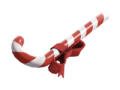 Candy Cane |
Allowed | Allowed | Allowed | Allowed | Allowed | Allowed |
| The Candy Cane will make anyone Scout kills drop a Small Health Kit on the ground for anyone to pick up, regardless of what weapon the Scout was using. However, the Candy Cane makes Scout take more damage from explosives, allowing any explosive to instantly kill the Scout with a direct hit or deal significant damage otherwise. While the healing provided by the Candy Cane would be very strong, the explosive vulnerability makes it almost unusable as two of the four main classes used in competitive primarily use explosives. | ||||||
 Fan O'War |
Allowed | Allowed | Allowed | Allowed | Allowed | Allowed |
| The Fan O'War does very little damage, but will inflict the Marked for Death debuff on anyone hit by it. However, only one person can be Marked for Death at a time, since if another person is hit while someone else still has their Marked for Death debuff, that person will lose their debuff. This weapon can be powerful but is very risky to use, and many Scouts find it safer to just shoot people like normal instead. | ||||||
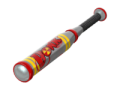
 Sandman |
Allowed | Allowed | Allowed | Allowed | Allowed | Allowed |
| The Sandman allows to launch a baseball at enemies. This baseball does very low damage but applies a slowdown debuff to anyone hit, along with dealing slightly more damage to target hit from far away. However, the slowdown debuff is bugged and can be completely negated by mashing both strafe keys, making it a worse version of the Wrap Assassin's bauble. On top of that, the Sandman also lowers Scout's health a dangerous amount, allowing him to get one-shot by directly hit rockets and close stickybombs. The near-useless baseball combined with the detrimental health penalty makes the Sandman a poor choice. | ||||||
 Sun-on-a-Stick |
Allowed | Allowed | Allowed | Allowed | Allowed | Allowed |
| The Sun-on-a-Stick gives Scout resistance to fire damage while deployed and does more damage to enemies who are on fire. While the extra damage isn't very helpful, taking less fire damage can sometimes be useful, although it's a bit niche as Pyro isn't always run. | ||||||
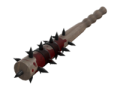
 Wrap Assassin |
Allowed | Allowed | Allowed | Allowed | Allowed | Allowed |
| The Wrap Assassin allows Scout to launch a glass ball. The damage this will deal is actually random, but it will usually be a decent amount. The bauble will shatter on impact, having a small splash radius and causing enemies directly hit to bleed. It can potentially be used to hit one of Demoman's projectiles and deflect it, but this is extremely hard to do. As for the actual melee, it is given a major damage penalty to compensate, but doesn't matter to most players. While most Scout's choose the Boston Basher, the Wrap Assassin is a solid option which can be used to harass enemies from a safe distance. | ||||||