ÜberCharge
In all competitive formats which involve a Medic, the gameplay focuses on the Medics' ÜberCharge. The outcome of the game is often decided on the difference of the Medics' Über percentages, since the Übercharge is extremely crucial in ending a stalemate, or making a push.
Contents
Basics[edit]
Charge rates[edit]
All of the Medic's Medi Guns have different charge rates, depending on the type of Medi Gun and the healed players' health.
| Healing tool | Health of target | % gained per second | Seconds to 100% über |
|---|---|---|---|
| Medi Gun | < 142.5% of base health | 2.5% / s | 40 seconds |
| > 142.5% of base health | 1.25% / s | 80 seconds | |
| Kritzkrieg | < 142.5% of base health | 3.125% / s | 32 seconds |
| > 142.5% of base health | 1.5625% / s | 64 seconds | |
| Quick-Fix | < 142.5% of base health | 3.125% / s | 32 seconds |
| > 142.5% of base health* | 1.5625% / s | 64 seconds |
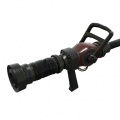
The Medigun
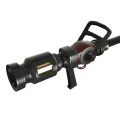
The Kritzkrieg
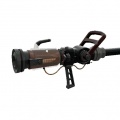
The Quick-Fix


- Please note, the slow Quick-Fix heal rate is extremely rare in competitive play but CAN happen with pyros with Powerjack overheal or spies being overhealed by the enemy medic.
Advantages and Disadvantages[edit]
Because of the ÜberCharge's long charge rate, it is the most important factor when deciding whether to push in or not. An advantage is having a higher percentage of the ÜberCharge than the enemy, and vice versa; a disadvantage is having a smaller percentage of the ÜberCharge.
The effects of the ÜberCharge, regardless of whether it is the Medi Gun or the Kritzkrieg, make it so that trying to retake any ground when in a disadvantageous ÜberCharge position will result in a failure. A particularly bad situation is a "full advantage", which refers to one medic having their ÜberCharge ready, and the other being at a low percentage (0%-20%).
Over the course of the match, Medics will "count" ÜberCharges. "Counting übers" refers to the practice of calculating the other Medic's percentage based on both Medics' respawn times and past ÜberCharges. For example, a surviving Medic can check the scoreboard after the opposing Medic's death and observe the moment in which he respawns. The Medic's percentage at that point is his advantage percentage.
Kritzkrieg[edit]
The Kritzkrieg is sometimes used to create an advantage for a team. When both Medics die and respawn roughly at the same time, one of the teams' (usually the attacking one) Medic selects the Kritzkrieg. Because of its shorter charge rate, assuming perfect building, the Kritzkrieg will be ready eight seconds before the Medi Gun ÜberCharge.
Building[edit]
Building is the process of having one class damaging itself, so as to get ÜberCharge faster, due to a mechanic that makes ÜberCharge charge faster if the person being healed is not fully overhealed. This is usually done by a Scout with the Boston Basher, due to its self-damaging and ammo saving attacks, or by a Pocket Soldier or Demoman with explosives.
Sometimes, on 5CP maps, when defending the last point with a disadvantage and knowing the other team has an ÜberCharge of their own, teams will abandon building in favour of the Medic overhealing players, to keep them in shape in case of an incoming push and to somewhat accelerate the charge rate of the ÜberCharge.
Deploying Übers[edit]
An ÜberCharge is ready when the Medic's percentage reaches 100%. This is connected with an automatically activated voice response and a spark on the Medi Gun. The ÜberCharge is deployed using the secondary fire button. It drains at a rate of 12.5% per second, regardless of the secondary weapon used.
The Medic can split the ÜberCharge between players by putting the healbeam on them; in addition, übered players do not immediately lose their invulnerability when the Medic takes the beam off them or reaches 0% ÜberCharge, but flash for one second while the invulnerability remains in effect. Übercharge drains only 50% faster for every additional player which is currently made invulnerable by the über, rather than 100%.[1]
Usage[edit]
The ÜberCharge is usually deployed when a team is trying to capture an objective by means of killing the enemy players, creating an exploitable player advantage that can be converted to a point capture.
ÜberCharge exchanges[edit]
When pushing into a team that has an ÜberCharge of their own, each team's aim is to damage the non-übered players, so that the Medic has to flash them. That leads to the decrease in the opposing ÜberCharge's duration, which allows for the team that didn't split the Über to stay invulnerable for longer and kill the remaining enemies.
Kritzkrieg[edit]
The Kritzkrieg's aim is to exploit the advantage in charge rates by killing the enemy Medic before he gets a Medi Gun ÜberCharge and either cap the final control point, or to keep exploiting the Kritzkrieg by keeping the opposing Medic down. It is a strategy usually run on the last point of a 5CP map.
It is not advisable however to choose the Kritzkrieg when the enemy using the Medi Gun has more than 25% ÜberCharge, as it is likely that it will be ready by the time the Kritzkrieg is. A Medi Gun ÜberCharge completely nullifies the effect of a Kritzkrieg, as it blocks all incoming damage, critical or not.
Once the Kritzkrieg ÜberCharge is ready, a team should aim to use it as soon as possible, as not to lose the window of opportunity in which it is most useful.
Targets[edit]
Medi Gun ÜberCharges are usually taken by a team's Pocket Soldier or Demoman. The Pocket Soldier spearheads all pushes, staying on high health, absorbing incoming damage and exploiting dealt damage. He is also very mobile, which enables him to move quickly. On the other side, the Demoman has potentially the biggest damage output per second, and many opportunities for area denial and control, using his Stickybomb Launcher. Because of that, he is very important to keep alive.
The Demoman will almost always receive a Kritzkrieg, as his Stickybombs have the best chance of reaching the enemy Medic, the biggest target of a Kritzkrieg. Stickies also deal splash damage, which makes it possible to kill multiple targets at once, and don't detonate immediately on firing, forcing the enemy to stay away from already placed critical stickies.