Difference between revisions of "Upward"
(Point A description + locations) |
|||
| Line 1: | Line 1: | ||
{{Map infobox | {{Map infobox | ||
| mapname = Upward | | mapname = Upward | ||
| − | | image = | + | | image = pl_upward.png |
| maptype = Payload | | maptype = Payload | ||
| currentversion = pl_upward | | currentversion = pl_upward | ||
| Line 8: | Line 8: | ||
| links = | | links = | ||
}} | }} | ||
| + | '''pl_upward''' is a single-stage [[Payload]] map created by Valve. It was the third Payload map added to the game. | ||
| + | |||
| + | Upward, alongside [[Badwater]], is one of the staple Payload maps played in Highlander. | ||
| + | |||
| + | == Strategy == | ||
| + | === First point === | ||
| + | {{Map locations | ||
| + | | title = Upward, first point, defenders' perspective | ||
| + | | image = pl_upward A1.png | ||
| + | | area1 = right | x1=700px | y1=77px | ||
| + | | area2 = left | x2=88px | y2=183px | ||
| + | | area3 = top | x3=419px | y3=114px | ||
| + | | area4 = under | x4=419px | y4=186px | ||
| + | | area5 = ground | x5=446px | y5=251px | ||
| + | }} | ||
| + | |||
| + | {{Map locations | ||
| + | | title = Upward, first point, attackers' perspective | ||
| + | | image = pl_upward A2.png | ||
| + | | area1 = slope | x1=403px | y1=88px | ||
| + | | area2 = entrance | x2=22px | y2=114px | ||
| + | | area3 = cliff | x3=110px | y3=286px | ||
| + | | area4 = tunnel | x4=321px | y4=210px | ||
| + | | area5 = ground | x5=549px | y5=284px | ||
| + | }} | ||
| + | ==== Attacking ==== | ||
| + | As always on Payload, the attack starts by preparing the [[ÜberCharge]] in spawn and leaving the Medic there for a short period of time while the rest of the team attempt to create an advantage by suiciding. Once an advantage has been created, the team can prepare for a push. | ||
| + | |||
| + | All viable push routes are located in open areas, which leaves the combo vulnerable to [[Sniper]]s. Because of that a Sniper pick is particularly useful on this point, as it allows to avoid a potential death of the Medic. | ||
| + | |||
| + | Generally, teams decide to push the first point through the cliff area, as most teams' combos will either hold the ground area or the under area. The only difference is the defense's sentry placement: | ||
| + | * If the sentry is located in '''under''', it forces the combo to use the ÜberCharge earlier, somewhere around the point area, to take it down. The main objective is to take the sentry down, as it allows for a point capture. | ||
| + | * If the sentry is located on the '''slope''', a team can attempt to flank the enemy by going directly through the entrance on the cliff and using the ÜberCharge closer to the Sentry Gun. If the enemy combo is unaware of the push, it cuts off their only viable escape route. The downside of this push is that if the Pyro is guarding the entrance, the ÜberCharged players can be easily knocked off the cliff. Going up to the sentry also takes longer, which means there's an elevated risk of a force or even a drop. | ||
| + | |||
| + | ==== Defending ==== | ||
| + | Due to the openness of the point, the defenders need to be particularly wary of jumping classes and sightlines. This means it's hard to establish a permanent hold on this point, so the defenders should seek only to delay the attackers. | ||
| + | |||
| + | The sentry's positioning is particularly important, as it shapes up the defense's game plan: | ||
| + | * Placing the sentry '''under''' means that its purpose is to deny the flank by making it impossible to capture the point before it's taken down. That means the sentry will be the first to go down after an enemy ÜberCharge, and once it's down, the defending team leaves the point, unless the attackers overcommit and lose too many players. | ||
| + | * Placing the sentry on '''slope''' means that it is a buffer zone. Once the enemy combo uses the ÜberCharge, the defenders can just back up to the sentry and then decide to either back out completely or go back in if possible. It allows to save the ÜberCharge for later, but the defenders need to be wary of the wrap-around push described above. | ||
| + | |||
| + | It's important to remember that the slope is the only viable escape route for the combo, as the tunnel area is easy to spam. The defenders need to keep that in mind and move early enough to be able to back out in time. | ||
{{Maps navbox|collapsed}} | {{Maps navbox|collapsed}} | ||
Revision as of 22:04, 31 August 2013
Template:Map infobox pl_upward is a single-stage Payload map created by Valve. It was the third Payload map added to the game.
Upward, alongside Badwater, is one of the staple Payload maps played in Highlander.
Strategy
First point
| Upward, first point, defenders' perspective |
|---|
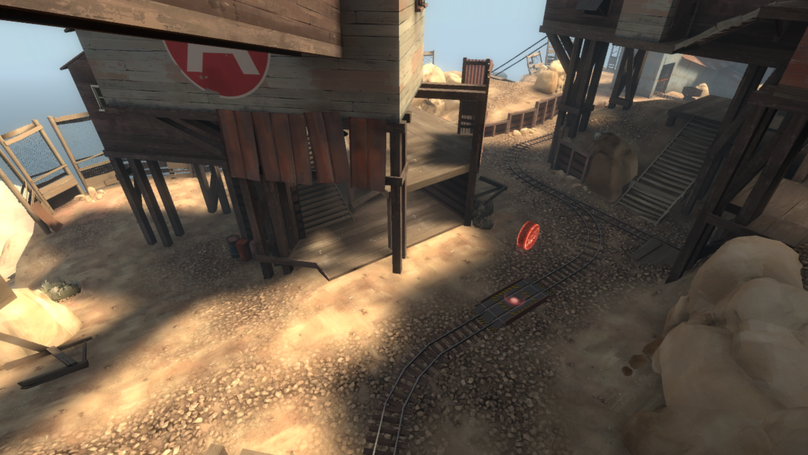
right left top under ground |
| Upward, first point, attackers' perspective |
|---|
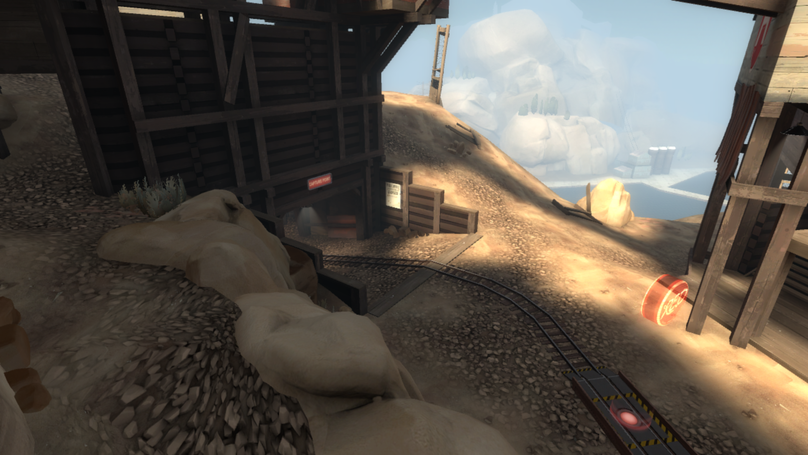
slope entrance cliff tunnel ground |
Attacking
As always on Payload, the attack starts by preparing the ÜberCharge in spawn and leaving the Medic there for a short period of time while the rest of the team attempt to create an advantage by suiciding. Once an advantage has been created, the team can prepare for a push.
All viable push routes are located in open areas, which leaves the combo vulnerable to Snipers. Because of that a Sniper pick is particularly useful on this point, as it allows to avoid a potential death of the Medic.
Generally, teams decide to push the first point through the cliff area, as most teams' combos will either hold the ground area or the under area. The only difference is the defense's sentry placement:
- If the sentry is located in under, it forces the combo to use the ÜberCharge earlier, somewhere around the point area, to take it down. The main objective is to take the sentry down, as it allows for a point capture.
- If the sentry is located on the slope, a team can attempt to flank the enemy by going directly through the entrance on the cliff and using the ÜberCharge closer to the Sentry Gun. If the enemy combo is unaware of the push, it cuts off their only viable escape route. The downside of this push is that if the Pyro is guarding the entrance, the ÜberCharged players can be easily knocked off the cliff. Going up to the sentry also takes longer, which means there's an elevated risk of a force or even a drop.
Defending
Due to the openness of the point, the defenders need to be particularly wary of jumping classes and sightlines. This means it's hard to establish a permanent hold on this point, so the defenders should seek only to delay the attackers.
The sentry's positioning is particularly important, as it shapes up the defense's game plan:
- Placing the sentry under means that its purpose is to deny the flank by making it impossible to capture the point before it's taken down. That means the sentry will be the first to go down after an enemy ÜberCharge, and once it's down, the defending team leaves the point, unless the attackers overcommit and lose too many players.
- Placing the sentry on slope means that it is a buffer zone. Once the enemy combo uses the ÜberCharge, the defenders can just back up to the sentry and then decide to either back out completely or go back in if possible. It allows to save the ÜberCharge for later, but the defenders need to be wary of the wrap-around push described above.
It's important to remember that the slope is the only viable escape route for the combo, as the tunnel area is easy to spam. The defenders need to keep that in mind and move early enough to be able to back out in time.