|
|
| Line 22: |
Line 22: |
| | | | |
| | ==Primary== | | ==Primary== |
| − | {| class="wikitable grid" width="100%" | + | {{Template:Class Spy Primary Table}} |
| − | ! class="header" width="15%" | Weapon
| |
| − | ! class="header" width="10%" | Kill Icon
| |
| − | ! class="header" width="8%" | [[ESEA]] [[Standard 6v6|6s]] legal?
| |
| − | ! class="header" width="8%" | [[UGC]] [[Highlander|HL]] legal?
| |
| − | ! class="header" width="8%" | [[ETF2L]] [[Standard 6v6|6s]] legal?
| |
| − | ! class="header" width="8%" | [[ETF2L]] [[Highlander|HL]] legal?
| |
| − | ! class="header" width="43%" | Info
| |
| − | |-
| |
| − | ! [[Image:Revolver-G.png]]<br /><small>'''Stock'''</small><br />'''[[Revolver]]'''
| |
| − | | align="center" | [[Image:Killicon Revolver.png]]
| |
| − | | align="center" bgcolor="lightgreen" rowspan="2"| <font color="black"> Yes </font>
| |
| − | | align="center" bgcolor="lightgreen" rowspan="2"| <font color="black"> Yes </font>
| |
| − | | align="center" bgcolor="lightgreen" rowspan="2"| <font color="black"> Yes </font>
| |
| − | | align="center" bgcolor="lightgreen" rowspan="2"| <font color="black"> Yes </font>
| |
| − | | rowspan="2" align="left"| The '''Revolver''' deals a base damage of 40, with a clip of 6 rounds. This weapon is a perfect choice for spies that either don't have the time line up head shots, or just feel more comfortable with consistently hitting body shots.
| |
| − | |-
| |
| − | ! [[Image:BigKill.png]]<br /><small>'''Promotional'''</small><br />'''[[Big Kill]]'''
| |
| − | | align="center" | [[Image:Killicon Bigkill.png]]
| |
| − | |-
| |
| − | ! [[Image:Ambassador-G.png]]<br /><small>'''Unlock'''</small><br />'''[[Ambassador]]'''
| |
| − | | align="center" | [[Image:Killicon Ambassador.png]]
| |
| − | | align="center" bgcolor="indianred" | <font color="white"> No </font>
| |
| − | | align="center" bgcolor="lightgreen" | <font color="black"> Yes </font>
| |
| − | | align="center" bgcolor="indianred" | <font color="white"> No </font>
| |
| − | | align="center" bgcolor="lightgreen" | <font color="black"> Yes </font>
| |
| − | | align="left" | The '''Ambassador''' deals a base damage of 34, with a clip of 6 rounds. Most notably, it has perfect accuracy on the first shot, allowing for 102 damage head shots, but has an accuracy fall off on a short cool down that starts after every shot. This makes it very effective at sniping from a distance, and can be used to acquire key picks.
| |
| − | |-
| |
| − | ! [[Image:L'Etranger-G.png]]<br /><small>'''Craft'''</small><br />'''[[L'Etranger]]'''
| |
| − | | align="center" | [[Image:Killicon L'Etranger.png]]
| |
| − | | align="center" bgcolor="indianred" | <font color="white"> No </font>
| |
| − | | align="center" bgcolor="lightgreen" | <font color="black"> Yes </font>
| |
| − | | align="center" bgcolor="indianred" | <font color="white"> No </font>
| |
| − | | align="center" bgcolor="lightgreen" | <font color="black"> Yes </font>
| |
| − | | align="left" | The '''L'Etranger''' deals a base damage of 32, with a clip of 6 rounds. On every hit, the user gains an additional 15% cloak. This weapon is extremely effective when coupled with the dead ringer due to the fact that it enables the player to regain the cloak needed to feign. This weapon is a necessary component in the Saharan Spy Set.
| |
| − | |-
| |
| − | ! [[Image:Enforcer-G.png]]<br /><small>'''Craft'''</small><br />'''[[Enforcer]]'''
| |
| − | | align="center" | [[Image:Killicon Enforcer.png]]
| |
| − | | align="center" bgcolor="indianred" | <font color="white"> No </font>
| |
| − | | align="center" bgcolor="lightgreen" | <font color="black"> Yes </font>
| |
| − | | align="center" bgcolor="indianred" | <font color="white"> No </font>
| |
| − | | align="center" bgcolor="lightgreen" | <font color="black"> Yes </font>
| |
| − | | align="left" | The '''Enforcer''' deals a base damage of 48, with a clip of 6 rounds. The Enforcer is known for having the highest base damage of all revolvers, with an additional damage boost of 20% when undisguised. This revolver has had a long history of controversy regarding it's balance, specifically in comparison with the Revolver. Similar to the Ambassador, it has -20% firing speed, and cannot get random crits.
| |
| − | |-
| |
| − | ! [[Image:DiamondBack.png]]<br /><small>'''Promotional'''</small><br />'''[[Diamondback]]'''
| |
| − | | align="center" | [[Image:Killicon Diamondback.png]]
| |
| − | | align="center" bgcolor="indianred" | <font color="white"> No </font>
| |
| − | | align="center" bgcolor="lightgreen" | <font color="black"> Yes </font>
| |
| − | | align="center" bgcolor="indianred" | <font color="white"> No </font>
| |
| − | | align="center" bgcolor="lightgreen" | <font color="black"> Yes </font>
| |
| − | | align="left" | The '''Diamondback''' deals a base damage of 34 and cannot get random critical hits. Perhaps what is most notable about the Diamondback is that, for every Engineer building a Spy saps, he will get one free critical hit (102 damage) for his Diamondback. This can be useful for taking out weak classes that you couldn't otherwise attack (say if there was still a Pyro by the combo). Spies choosing to use the Diamondback often try and sap several of the engineer's buildings at once, before unleashing the crits to get a key pick such as the medic or demo.
| |
| − | |}
| |
| | | | |
| | ==Secondary== | | ==Secondary== |
| − | {| class="wikitable grid" width="100%" | + | {{Template:Class Spy Secondary Table}} |
| − | ! class="header" width="15%" | Weapon
| |
| − | ! class="header" width="10%" | Kill Icon
| |
| − | ! class="header" width="8%" | [[ESEA]] [[Standard 6v6|6s]] legal?
| |
| − | ! class="header" width="8%" | [[UGC]] [[Highlander|HL]] legal?
| |
| − | ! class="header" width="8%" | [[ETF2L]] [[Standard 6v6|6s]] legal?
| |
| − | ! class="header" width="8%" | [[ETF2L]] [[Highlander|HL]] legal?
| |
| − | ! class="header" width="43%" | Info
| |
| − | |-
| |
| − | ! [[Image:Sapper.png]]<br /><small>'''Stock'''</small><br />'''[[Sapper]]'''
| |
| − | | align="center" | [[Image:Killicon Sapper.png]]
| |
| − | | align="center" bgcolor="lightgreen" | <font color="black"> Yes </font>
| |
| − | | align="center" bgcolor="lightgreen" | <font color="black"> Yes </font>
| |
| − | | align="center" bgcolor="lightgreen" | <font color="black"> Yes </font>
| |
| − | | align="center" bgcolor="lightgreen" | <font color="black"> Yes </font>
| |
| − | | align="left" | The '''Sapper''' is the Spy's tool for disabling and destroying enemy engineers buildings. The stock sapper will disable an enemy building when placed, but if an enemy engineer removes the sapper, the building will continue to operate. Therefore, a more effective way of sapping for Highlander is killing the engineer before sapping. A good time for this is usually with your teams uber or kritz push.
| |
| − | |-
| |
| − | ! [[Image:Redtape.png]]<br /><small>'''Craft'''</small><br />'''[[Red Tape Recorder]]'''
| |
| − | | align="center" | [[Image:Killicon RTR.png]]
| |
| − | | align="center" bgcolor="lightgreen" | <font color="black"> Yes </font>
| |
| − | | align="center" bgcolor="indianred" | <font color="white"> No </font>
| |
| − | | align="center" bgcolor="indianred" | <font color="white"> No </font>
| |
| − | | align="center" bgcolor="indianred" | <font color="white"> No </font>
| |
| − | | align="left" | Much like the stock sapper, the '''Red Tape Recorder''' also disables enemy engineer's buildings. This sapper, however, does not destroy the buildings it saps, rather it reverses the construction of the building. The controversy surrounding this sapper is great. This is why it is legal in only one Competitive league so far.
| |
| − | |}
| |
| | | | |
| | ==PDA2== | | ==PDA2== |
| − | {| class="wikitable grid" width="100%" | + | {{Template:Class Spy PDA Table}} |
| − | ! class="header" width="15%" | Weapon
| |
| − | ! class="header" width="10%" | Kill Icon
| |
| − | ! class="header" width="8%" | [[ESEA]] [[Standard 6v6|6s]] legal?
| |
| − | ! class="header" width="8%" | [[UGC]] [[Highlander|HL]] legal?
| |
| − | ! class="header" width="8%" | [[ETF2L]] [[Standard 6v6|6s]] legal?
| |
| − | ! class="header" width="8%" | [[ETF2L]] [[Highlander|HL]] legal?
| |
| − | ! class="header" width="43%" | Info
| |
| − | |-
| |
| − | ! [[Image:Invis.png]]<br /><small>'''Stock'''</small><br />'''[[Invis Watch]]'''
| |
| − | | align="center" | N/A
| |
| − | | align="center" bgcolor="lightgreen" rowspan="3"| <font color="black"> Yes </font>
| |
| − | | align="center" bgcolor="lightgreen" rowspan="3"| <font color="black"> Yes </font>
| |
| − | | align="center" bgcolor="lightgreen" rowspan="3"| <font color="black"> Yes </font>
| |
| − | | align="center" bgcolor="lightgreen" rowspan="3"| <font color="black"> Yes </font>
| |
| − | | rowspan="3" align="left"| The default '''Invis Watch''' for spy is timed. It provides the spy with 9 seconds of cloak time. While cloaked or uncloaked a spy can pick up ammo boxes as well as dropped weapons to refill the cloak meter. The Invis Watch is best suited for an aggressive play style, allowing for more picks. Watch out for enemies however because bumping into them will make you visible!
| |
| − | |-
| |
| − | ! [[Image:ET.png]]<br /><small>'''Promotional'''</small><br />'''[[Enthusiast's Timepiece]]'''
| |
| − | | align="center" | N/A
| |
| − | |-
| |
| − | ! [[Image:quackenbirdt.png]]<br /><small>'''Promotional'''</small><br />'''[[Quäckenbirdt]]'''
| |
| − | | align="center" | N/A
| |
| − | |-
| |
| − | ! [[Image:CandD.png]]<br /><small>'''Craft'''</small><br />'''[[Cloak and Dagger]]'''
| |
| − | | align="center" | N/A
| |
| − | | align="center" bgcolor="indianred" | <font color="white"> No </font>
| |
| − | | align="center" bgcolor="lightgreen" | <font color="black"> Yes </font>
| |
| − | | align="center" bgcolor="indianred" | <font color="white"> No </font>
| |
| − | | align="center" bgcolor="lightgreen" | <font color="black"> Yes </font>
| |
| − | | align="left" | The '''Cloak and Dagger''' is motion sensitive, which means that while a player isn't moving the cloak will build. This watch has a double cloak recharge rate as well as a 29% faster cloak drain rate. Also, this watches cloak can not be replenished by ammo boxes or dropped weapons. The Cloak and Dagger is best suited for a more passive play style, providing the player with the ability to wait and call important things like enemy combo positioning as well as Medic ubercharge.
| |
| − | |-
| |
| − | ! [[Image:DR.png]]<br /><small>'''Craft'''</small><br />'''[[Dead Ringer]]'''
| |
| − | | align="center" | N/A
| |
| − | | align="center" bgcolor="lightgreen" | <font color="black"> Yes </font>
| |
| − | | align="center" bgcolor="lightgreen" | <font color="black"> Yes </font>
| |
| − | | align="center" bgcolor="indianred" | <font color="white"> No </font>
| |
| − | | align="center" bgcolor="lightgreen" | <font color="black"> Yes </font>
| |
| − | | align="left" | The '''Dead Ringer''' is unique among the spy watches. Instead of cloaking the player when deployed, it is held in the players hand. While the Dead Ringer is out the player will not be able to attack, but when the player takes damage only 10% of the damage given will be taken by the player. In addition, the player will go invisible and drop a dead body therefore feigning death. For the 6.5 seconds of cloak time the Dead Ringer provides, you will not become visible. However, if you extend that time with ammo packs you will be visible when bumped. The Dead Ringer is best suited for an even more aggressive play style than the Invis Watch, allowing you to get in your enemies face before feigning.
| |
| − | |}
| |
| | | | |
| | ===Melee=== | | ===Melee=== |
The Spy is a suave backstabbing rogue that has the ability to insta-kill any class in the game with their knife. Spies are valued in that they can get important picks through the manipulation and deception of the enemy team. The Spy arguably has the worst direct combat ability, as it is solely designed to only get one or two kills at a time. As a pick class, the Spy will usually target the enemy Demoman, Heavy or Medic and either get the Medic to pop or drop his Übercharge. The Spy is also capable of incapacitating and destroying the Engineer's buildings.
6v6
Main Article: Spy (6v6)
In 6v6, the Spy is considered an offclass. It is most often run when one team has a disadvantage and they need to try and create an advantage (usually through dropping the enemy Medic's Über).
Highlander
Main Article: Spy (Highlander)
In Highlander, the Spy is often used to pick the enemy Medic, Heavy, Demoman, Sniper, and Engineer. Spies in Highlander must be aware that the enemy team has a full-time Pyro and is spychecking more often, leaving the Spy with less opportunities for picks.
The Spy is also the best scouting class in the game, providing invaluable information for his team. He can find how far along a Medic is to fully charging his ubercharge, where the enemy team is located, and in what direction they are moving towards in the safety provided by his watches.
Trickstabs
When spotted or confronted by an enemy, a spy is almost always put at a disadvantage, due to his low damage output. In times of need, Spies may use trickstabs to place themselves behinds the enemy. The are a multitude of ways to do so. While some are more useful/successful than others, each method can be used accordingly in different situations to get out of trouble.
Weapons
Primary
Template:Class Spy Primary Table
Secondary
Template:Class Spy Secondary Table
PDA2
Template:Class Spy PDA Table
Melee
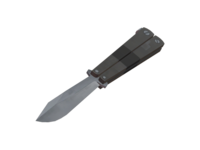
Stock
Knife
|

|
Yes
|
Yes
|
Yes
|
Yes
|
The Knife is the most powerful weapon in the spy's arsenal. On back stab it does 6x the enemy's current health. When hitting anywhere else besides the back it does a base damage of 40 (also called butter-knifing). Spies have the capability of getting behind the enemy lines by means of cloaking and disguising, then using the knife to backstab enemies. Though the Knife is very powerful, players must not forget that they also have a gun.
|
Promotional
Black Rose
|

|
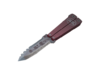
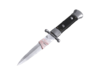
Craft
Your Eternal Reward
|

|
Yes
|
Yes
|
No
|
Yes
|
Using Your Eternal Reward removes the spies ability to disguise with the disguise kit. The spy can only disguise by successfully backstabbing an enemy. Upon backstab, the Spy will immediately disguise as the victim, the victim's body will disappear without noise, and the enemy team will receive no killfeed of their teammate dying. In the competitive scene, this knife holds controversy due to the fact that without a disguise it is near impossible to get the initial backstab.
|
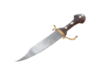
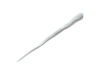
Craft
Wanga Prick
|

|

Promotional
Conniver's Kunai
|

|
Yes
|
Yes
|
No
|
Yes
|
When the Conniver's Kunai is equipped, the player starts out with 60 health. On backstab, the Spy absorbs the victims health. The maximum health the Spy can reach is 180. Upon backstab flames can also be put out. The controversy behind this knife is whether or not starting out with 60 health is worth getting health later.
|
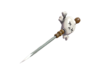
Craft
Big Earner
|

|
Yes
|
Yes
|
No
|
Yes
|
The Big Earner grants the Spy +30% of their cloak meter upon backstab, but trades it for 25 less health. As the Spy is already a fragile class, the health debuff makes this knife one rarely seen in competitive play.
|
Craft
Spy-Cicle
|

|
No
|
Yes
|
No
|
Yes
|
The Spy-Cicle acts like "Pyro insurance" in that, when the Spy is lit on fire, the Spy-Cicle melts and allows the Spy to become fireproof for 2 seconds. This is useful for keeping the Spy alive in order to find a better opportunity for a pick, but the Spy-Cicle is still melted and unusable for 15 seconds. As well, the Spy-Cicle is a silent killer that makes no noise on backstabs. Backstabbed victims are turned into ice sculptures, revealing the Spy's presence.
|
External Links
DarkNecrid's Comprehensive Pub & Competitive Spy Guide


